

DIY friendship bracelets

There’s nothing like a handmade friendship bracelet to show your besties just how much you care. These school holidays, if your kids have a few friends over, why not gather them around the craft table and get their creative juices flowing by helping them make their very own friendship bracelets?
Using strong embroidery thread in a variety of colours, these bracelets are made to last and will ensure your kids share a special bond with their closest friends long after the play date is over. All you have to do now is head into your local Stockland shopping centre to gather your supplies and follow the steps below to help your kids create their own colourful set of friendship bracelets.
What you’ll need: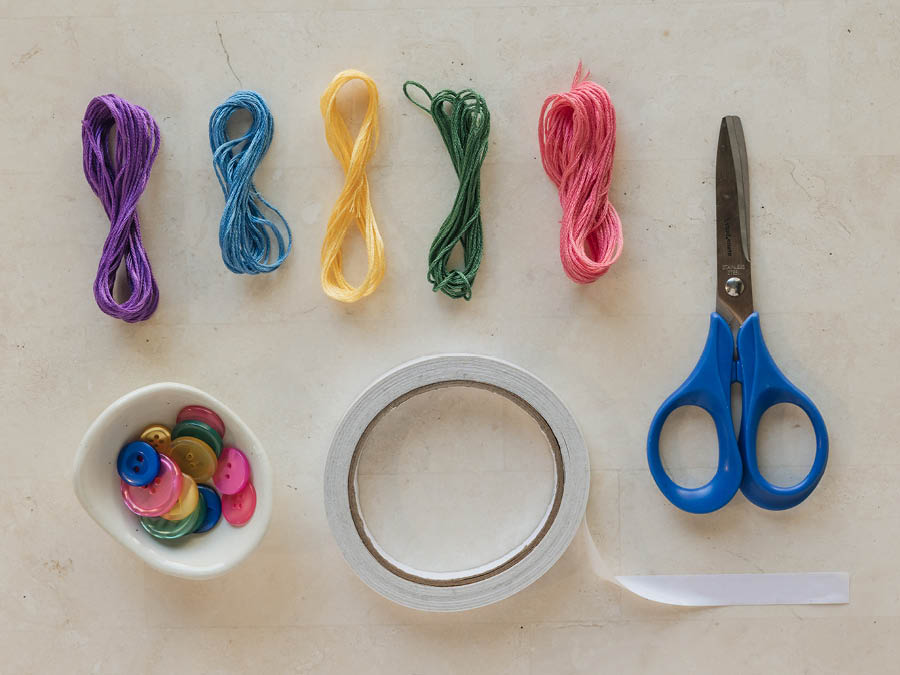
- Embroidery thread
- Scissors
- Tape
- Buttons
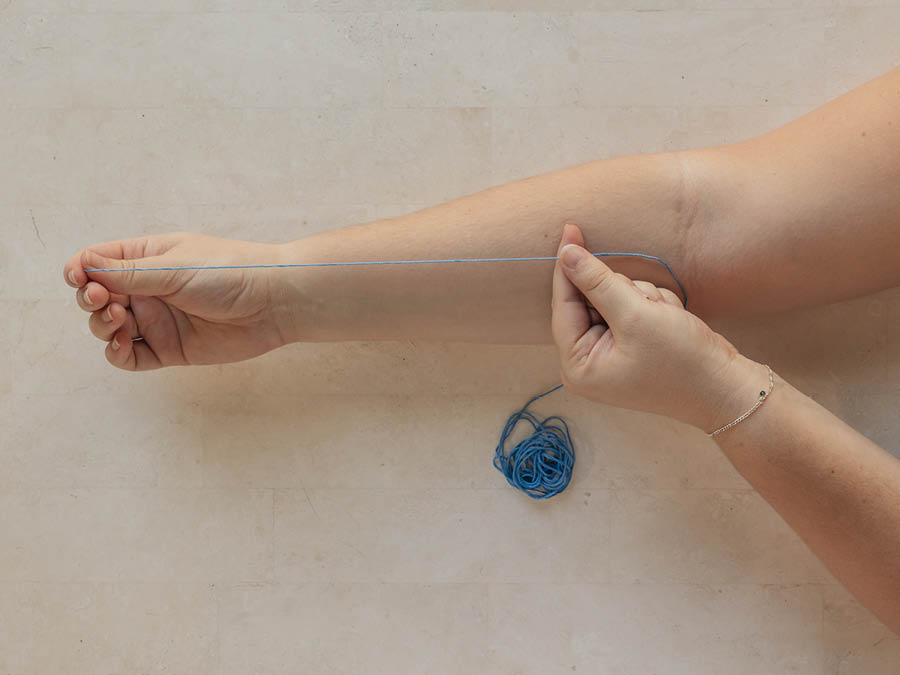
Step one
Wrap a piece of thread around your wrist once and cut the thread at the point where it connects. You should now have one piece of thread that perfectly wraps around your wrist to use as a guide when making your bracelets.
Step two
Measure the length of your arm from your fingertips to your shoulder. Double that length to find out how long your thread should be. Select three different coloured pieces of thread and cut accordingly.
Step three
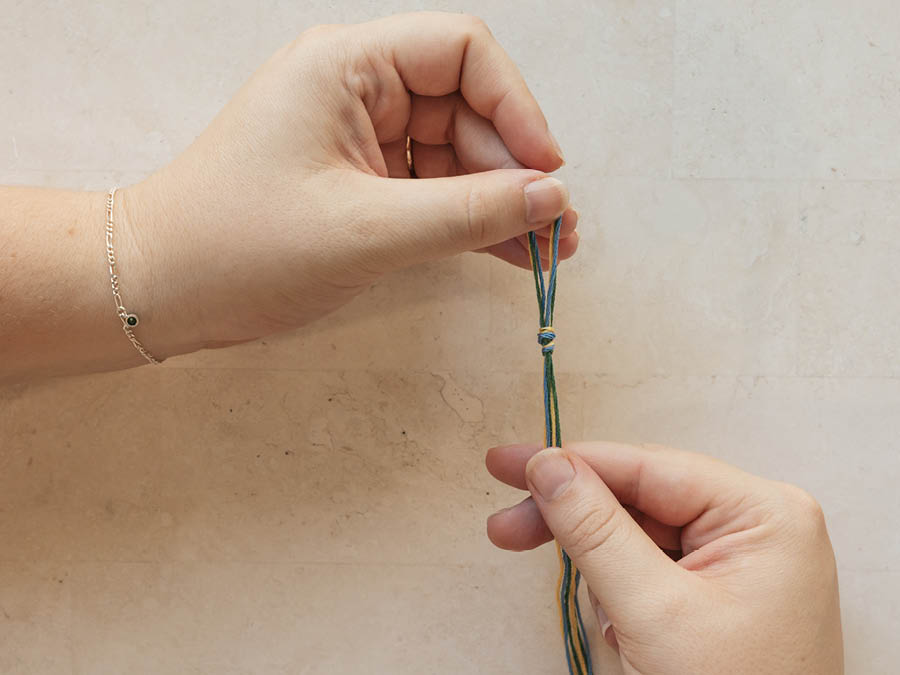
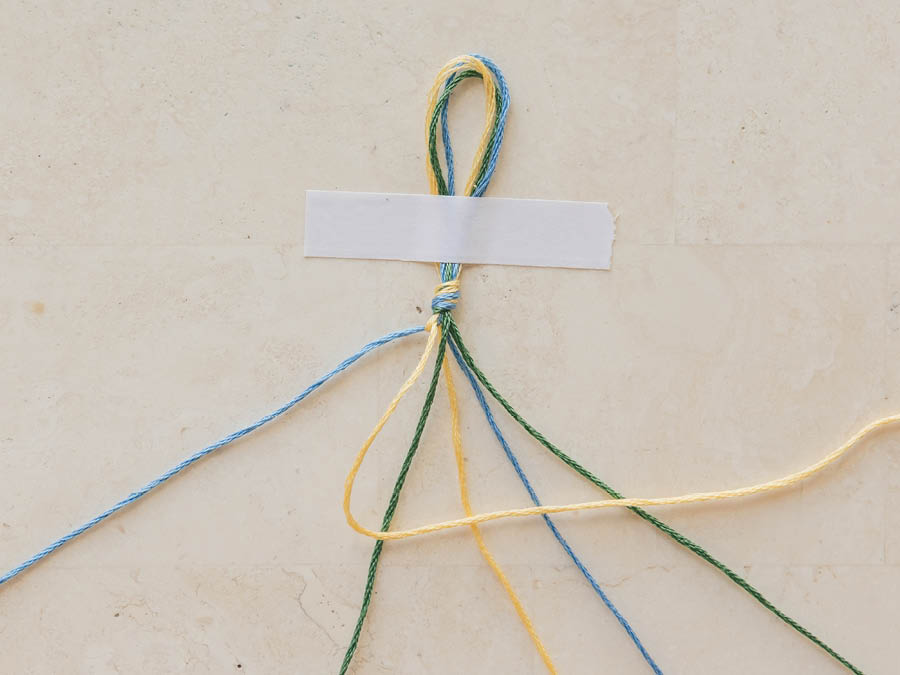
Fold your three strands of thread in half. Create an overhand knot at the fold this will be a small loop for the button closure.
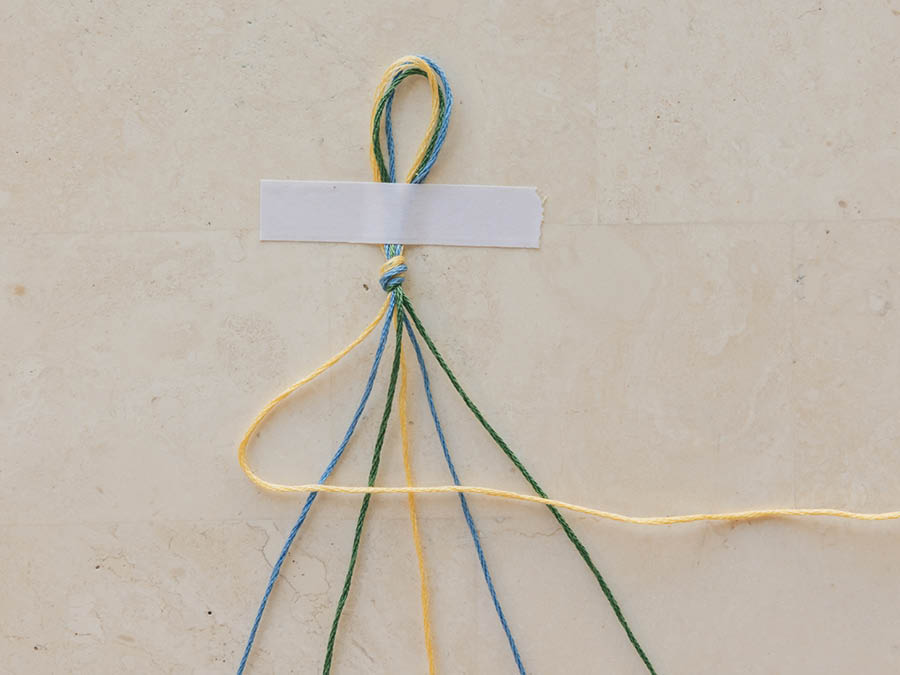
Step four
Tape the looped end of your thread onto a table. Arrange your six pieces of thread in the colour order you’d like. The thread on the left side will create the first row of colour.
Step five
Start creating your bracelet using the forward knot method. Take the first piece of thread on the left and bend it on top of the thread to the right of the first piece, creating a ‘4’ shape.
Step six
Wrap the tail of the first thread around the second thread by going under it and pulling the tail through the middle of the ‘4’. Hold the second piece of thread straight and pull the first thread upwards, tightening to secure.
Step seven
Repeat step five until you’ve knotted your first thread all the way across to the right-hand side. Then return to the left and continue creating your knots until you’ve created enough knots to match the length of the thread you wrapped around your wrist in step one.
Step eight
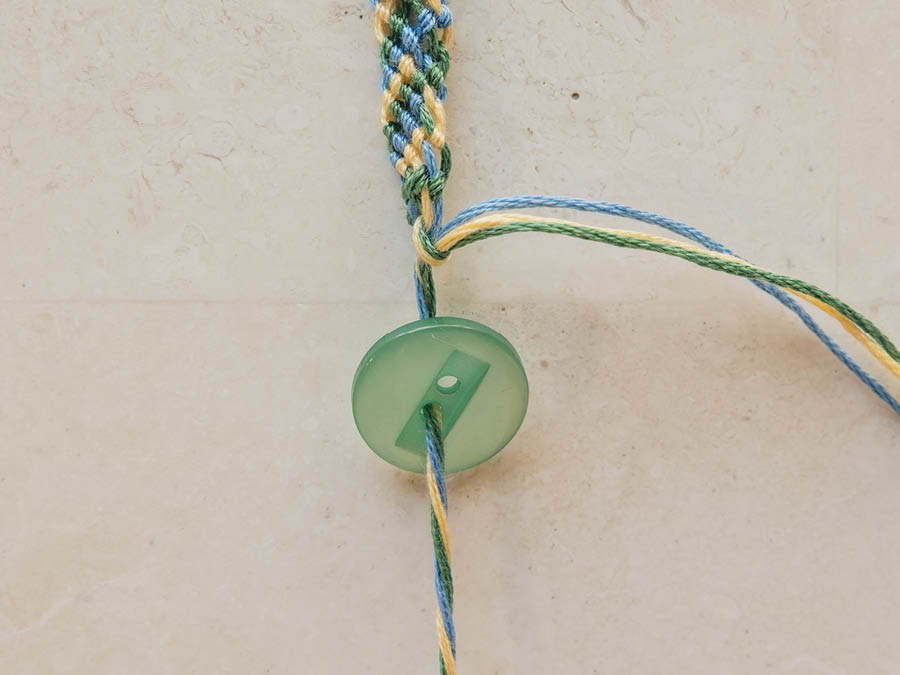
Slide three strands of thread into one of the holes in your button and the other three strands into the second hole. Tie these strands together to secure the end of your bracelet and trim any loose strands of thread.
There you have it, a colourful new friendship bracelet your kids can swap with their friends. This activity will certainly bring them all together and won’t just entertain them but will also make perfect handmade gifts if there happen to have a birthday or two coming up. The best part? You can get all your supplies at your local Stockland shopping centre. So come and visit us in centre to get crafting!
For more everyday inspiration, updates on the latest trends and exclusive offers, register now as a Stockland Member to receive monthly updates, latest news, and exclusive events from your local Stockland Shopping Centre.
This information has been provided by our Stockland retailers. All reasonable care has been taken to ensure that the information is correct at the time of the content going live. However, no warranty is given as to the accuracy of that information. The information may change from time to time without notice. Stocks are limited and only available while stocks last with individual retailers. Products may vary from location to location. Prices may also change without notice. Please contact our retailers for more information.